
Essential Components for Your Custom PC Build
Share
The Ultimate Guide to Building Your Own PC
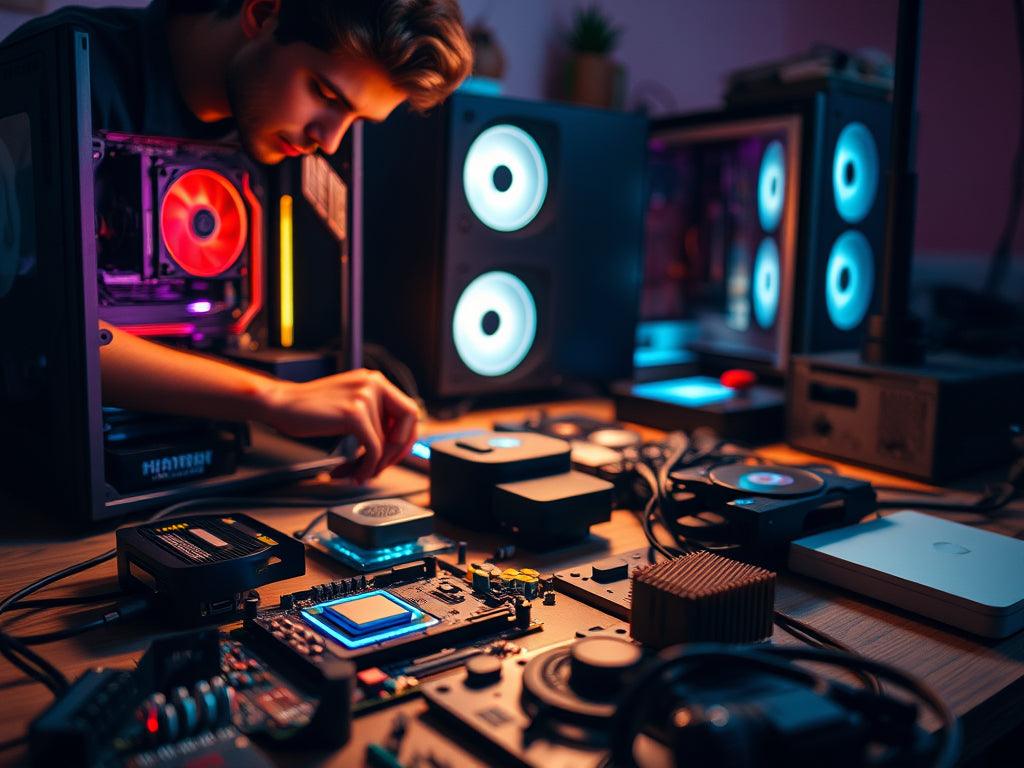
Building your own PC can be both rewarding and intimidating, especially if it's your first time. Not only do you gain a better understanding of your machine, but you also get to tailor it to fit your needs precisely. Whether you’re building a gaming powerhouse, a workhorse for content creation, or a simple setup for everyday tasks, this guide will walk you through each step with visuals to help you every step of the way. Let's dive in!
Table of Contents:
- Why Build Your Own PC?
- PC Components Breakdown
- Planning Your Build (Specs & Budget)
- Step-by-Step Assembly Guide
- Testing & Troubleshooting
- FAQs
1. Why Build Your Own PC?
Building your own computer allows you to:
- Customize components for your specific needs
- Save money by choosing the best parts for your budget
- Upgrade individual components over time
- Gain hands-on experience with computer hardware
2. PC Components Breakdown
Before diving into assembly, let’s look at each essential component:
- Central Processing Unit (CPU): The brain of the computer. Choose a CPU based on your workload (e.g., gaming, video editing).
- Motherboard: The main circuit board, connecting all components.
- Memory (RAM): Temporary storage that helps your computer run programs. 16GB is typically sufficient for most users, while 32GB is recommended for power users.
- Storage (SSD/HDD): Holds your operating system, applications, and files. SSDs are faster but more expensive than traditional HDDs.
- Graphics Processing Unit (GPU): Important for gaming and graphic-intensive tasks.
- Power Supply Unit (PSU): Provides power to all components.
- Case: Houses all your components. Consider cooling options and cable management.
3. Planning Your Build (Specs & Budget)
- Set Your Budget: Decide on a realistic budget. A decent gaming build can range from $800 to $2000+.
- Choose Your Components Based on Need: Decide what your primary use will be to pick the right components.
- Check for Compatibility: Ensure all parts are compatible with each other (e.g., the CPU socket type with the motherboard).
4. Step-by-Step Assembly Guide
Tools Needed:
- Phillips screwdriver
- Anti-static wristband (recommended)
Step 1: Install the CPU on the Motherboard
- Open the CPU socket on your motherboard and carefully place the CPU inside, aligning the arrow on the CPU with the one on the motherboard socket.
- Close the socket and secure it.
Step 2: Install RAM
- Locate the RAM slots on your motherboard. If using two sticks, install them in the recommended slots for dual-channel performance (often slots 1 & 3 or 2 & 4).
- Firmly push each RAM stick until it clicks.
Step 3: Install Storage (SSD/HDD)
- For an M.2 SSD, locate the M.2 slot on the motherboard, insert the SSD at a slight angle, then secure it with a screw.
- For a 2.5” SSD or HDD, use the mounting brackets in the case and connect it to the motherboard using SATA cables.
Step 4: Mount the Motherboard in the Case
- Locate the standoff screws inside your case and align them with the screw holes on the motherboard.
- Secure the motherboard with screws, ensuring it’s firmly in place.
Step 5: Install the GPU
- Find the PCIe slot on the motherboard, remove any necessary covers from the case, and gently push the GPU into the slot until it clicks.
- Screw the GPU to the case for stability.
Step 6: Connect the Power Supply (PSU)
- Secure the PSU in the designated area of your case, usually at the bottom.
- Connect the main 24-pin power cable to the motherboard.
- Connect the CPU power cable to the motherboard’s CPU power slot.
- Attach the power cables to your GPU, storage devices, and any other components.
Step 7: Cable Management
- Use zip ties or cable ties to keep cables organized and improve airflow inside your case.
5. Testing & Troubleshooting
- First Boot: Plug in your monitor, keyboard, and mouse, then power on your PC.
- BIOS Setup: Access the BIOS to ensure all components are detected (CPU, RAM, storage).
- OS Installation: Use a USB drive to install your preferred operating system.
- Test for Stability: Run stress tests for the CPU and GPU to ensure stability.
6. FAQs
Q1: Is building a PC hard?
Building a PC is surprisingly straightforward if you follow guides like this one.
Q2: How long does it take to build a PC?
For beginners, it can take anywhere from 1 to 3 hours.
Q3: Can I upgrade components later?
Absolutely! One of the biggest benefits of building your own PC is easy upgrades.
1. Why Build Your Own PC? (Extended)
Building a custom PC gives you full control over the performance, quality, and aesthetics of your setup. Here’s why enthusiasts and professionals alike choose to go the DIY route:
- Performance and Customization: Off-the-shelf PCs often have limited customization options. With a custom build, you can choose each part to maximize performance for specific tasks, whether gaming, programming, or content creation.
- Cost Efficiency: Prebuilt computers often have extra costs for assembly and warranty. Building your own PC allows you to allocate the budget where it counts.
- Upgrade Paths: Need more RAM or a better GPU down the road? Upgrading is easier and often cheaper when you've built the system yourself.
2. PC Components Breakdown (Extended)
Key Considerations When Choosing Each Component:
-
CPU:
- Intel vs. AMD: Intel typically offers slightly better single-core performance, which can be beneficial for gaming. AMD, on the other hand, provides strong multi-core performance, making it ideal for multitasking and heavy applications.
- Core Count: For basic tasks, 4 cores are enough, while gamers and professionals benefit from 6-8 cores. For intensive tasks, like 3D rendering, 12 cores or more is ideal.
-
Motherboard:
- Form Factor: ATX, MicroATX, and Mini-ITX are common sizes. ATX boards generally offer more features, while MicroATX and Mini-ITX save space.
- Chipset: The chipset affects overclocking capabilities, connectivity, and features like support for multiple GPUs.
-
Memory (RAM):
- Speed and Latency: RAM speed (e.g., 3200 MHz) can impact performance, especially for AMD systems. Lower latency is generally better but has less impact on everyday performance than speed.
- Capacity: For general use, 8GB is enough, while gaming often requires 16GB. Heavy workloads like video editing benefit from 32GB or more.
-
Storage:
- SSD vs. HDD: SSDs, especially NVMe M.2 drives, are much faster than traditional HDDs, resulting in shorter boot times and faster load times for applications.
- Storage Strategy: Many builders use an SSD for their operating system and essential applications, with a larger HDD for files and less-used applications.
-
Graphics Processing Unit (GPU):
- Purpose: Gamers should focus on GPUs with higher VRAM and better 3D rendering capabilities. Content creators may want GPUs with powerful parallel processing abilities.
- VRAM: A minimum of 4GB is recommended for light gaming; 8GB+ is better for high-end gaming or video editing.
-
Power Supply Unit (PSU):
- Wattage: Calculate the wattage of your build to choose an appropriate PSU. Use a power calculator (available online) to estimate your requirements accurately.
- Efficiency: Look for an 80 PLUS Bronze rating or higher to ensure efficiency and reliability.
-
Case:
- Airflow: Choose a case with good ventilation and room for case fans. Larger cases generally offer better airflow and cable management space.
3. Planning Your Build (Specs & Budget) - Detailed Guide
When building your PC, planning is key. A few extra considerations include:
- Future-Proofing: If you want to keep your PC relevant for years, opt for a motherboard with features like PCIe 4.0/5.0 support, additional RAM slots, and compatibility with newer CPU generations.
- Prioritize Your Budget: Spend the most on components that directly affect performance based on your primary usage. Gamers might prioritize the GPU, while content creators might invest more in a high-core-count CPU and RAM.
4. Step-by-Step Assembly Guide (Extended with Visuals)
Preparing the Workspace:
- Organize Tools: Gather all components and tools (like a Phillips screwdriver and anti-static wristband) on a flat surface.
- Safety First: Work on a non-carpeted surface to avoid static buildup, and use an anti-static wristband to prevent static discharge damage to sensitive parts.
Step-by-Step Assembly with Visuals:
-
Installing the CPU:
- Gently lift the CPU socket lever on the motherboard.
- Align the CPU with the socket—often indicated by a small triangle on both the CPU and socket.
- Close and secure the socket lever after installation.
-
Attaching the CPU Cooler:
- Apply a pea-sized amount of thermal paste on the CPU if your cooler doesn't come with pre-applied paste.
- Secure the cooler over the CPU, ensuring it's firmly attached.
-
Inserting RAM:
- Push each RAM module into the appropriate slot, applying pressure until it clicks.
-
Installing the Storage:
- For M.2 SSDs, position them in the slot and secure them with a screw.
- 2.5” SSDs and HDDs typically go into drive bays in the case, secured with screws or mounting brackets.
-
Mounting the Motherboard in the Case:
- Align the motherboard with the case standoffs.
- Use screws to secure it tightly.
-
Installing the Graphics Card (GPU):
- Open the PCIe slot latch on the motherboard.
- Insert the GPU into the slot until it clicks.
- Use screws to secure it to the case.
-
Connecting Power Cables:
- Connect the 24-pin ATX power cable to the motherboard.
- Connect the CPU power cable (often 8-pin) near the CPU socket.
- Attach power connectors to the GPU, storage, and any additional components.
-
Managing Cables:
- Use cable ties to keep cables organized, ensuring good airflow.
5. Testing & Troubleshooting (Detailed)
First Boot Checklist:
- Ensure all power cables are connected securely.
- Double-check that the GPU and RAM are seated properly.
- Start the PC and enter the BIOS by pressing the designated key (often DEL or F2).
Common Issues and Solutions:
- PC won’t power on: Check power cables and ensure the PSU switch is on.
- No display: Confirm that the GPU and RAM are securely seated.
- Random shutdowns: This could be a thermal issue; make sure the CPU cooler is installed correctly.
OS and Driver Installation:
- Install your OS (e.g., Windows or Linux) using a bootable USB drive.
- Install necessary drivers, especially for your GPU, motherboard, and network components.
6. FAQ (Extended)
Q4: What’s the difference between ATX and MicroATX motherboards?
ATX motherboards are larger and often offer more slots and features. MicroATX boards are compact and suitable for smaller cases but may lack some advanced features.
Q5: Do I need a dedicated GPU if I’m not gaming?
For tasks like office work and web browsing, a dedicated GPU is not necessary; many CPUs have integrated graphics sufficient for basic tasks.
1. Central Processing Unit (CPU)
- Description: The CPU is the brain of the computer, performing calculations and running instructions. It’s critical for multitasking and processing speed.
- Popular Models: Intel Core i5, i7, and i9; AMD Ryzen 5, Ryzen 7, and Ryzen 9.
- Image Prompt: Close-up of a CPU chip labeled "Intel Core i7" or "AMD Ryzen" with its metallic and circuit design visible.
2. Motherboard
- Description: The motherboard is the main circuit board that connects all the components. It hosts the CPU socket, RAM slots, storage slots, and expansion ports.
- Popular Models: ASUS ROG Strix, MSI MPG Z490, Gigabyte Aorus Elite.
- Features: Different motherboards support various CPU types, sizes (ATX, MicroATX, Mini-ITX), and expansion capabilities.
- Image Prompt: A top-down view of a motherboard with labeled components such as CPU socket, RAM slots, PCIe slots, and storage connectors.
3. Random Access Memory (RAM)
- Description: RAM is temporary storage that allows the CPU to quickly access data for active tasks. The amount and speed of RAM impact system responsiveness and multitasking.
- Popular Models: Corsair Vengeance LPX, G.Skill Trident Z, Kingston HyperX Fury.
- Specifications: Typically, 8GB is the minimum, 16GB is recommended for most users, and 32GB or more is great for high-end tasks.
- Image Prompt: Two RAM sticks labeled "16GB DDR4 RAM" with heat spreaders, showing the circuit board and metal casing.
4. Storage (SSD/HDD)
- Description: Storage devices hold the operating system, software, and files. SSDs are much faster than HDDs, resulting in quick boot times and faster application load times.
-
Types:
- SSD (Solid State Drive): Faster but more expensive, ideal for the OS and frequently-used programs.
- HDD (Hard Disk Drive): Cheaper, slower, and suitable for large file storage.
- Popular Models: Samsung 970 Evo (SSD), Western Digital Blue (HDD).
- Image Prompt: A rectangular SSD labeled "500GB NVMe SSD" and a bulkier HDD labeled "1TB HDD" side by side for comparison.
5. Graphics Processing Unit (GPU)
- Description: The GPU is responsible for rendering graphics. For gamers and content creators, a dedicated GPU is essential for smooth visuals and fast rendering.
- Popular Models: NVIDIA GeForce RTX 3060, AMD Radeon RX 6700 XT.
- Specifications: The more VRAM, the better for high-resolution gaming and 3D rendering (4GB VRAM for basic tasks, 8GB or more for heavy gaming).
- Image Prompt: A detailed view of a GPU labeled "NVIDIA GeForce RTX" with visible cooling fans and metal casing.
6. Power Supply Unit (PSU)
- Description: The PSU provides power to all components. It converts power from the wall outlet to the voltages required by the computer’s components.
- Popular Models: Corsair RM750x, EVGA SuperNOVA 650 G5.
- Specifications: Power output (measured in watts) should match the needs of your components. An 80 PLUS certification indicates efficiency.
- Image Prompt: A PSU box labeled "Corsair 750W 80 PLUS Gold" with visible cabling and fan vent.
7. Computer Case
- Description: The case houses and protects all components while providing airflow for cooling. It often includes mounting spaces for fans and options for cable management.
- Popular Models: NZXT H510, Fractal Design Meshify C, Corsair 4000D.
- Specifications: Cases come in various sizes (Full Tower, Mid Tower, Mini Tower) and should match the motherboard size.
- Image Prompt: A sleek black PC case labeled "NZXT H510" with transparent side panel showing internal layout for airflow and cable management.
8. CPU Cooler
- Description: The CPU cooler prevents overheating, maintaining optimal performance by dispersing heat. It can be either an air cooler or a liquid cooler.
- Popular Models: Cooler Master Hyper 212 (air cooler), NZXT Kraken X63 (liquid cooler).
- Specifications: Cooling capacity depends on design; liquid coolers are better for high-performance CPUs.
- Image Prompt: A fan-and-heatsink air cooler labeled "Cooler Master Hyper 212" and a liquid cooler labeled "NZXT Kraken" with radiator and tubing.
1. CPU (Central Processing Unit)
-
Intel Options:
- Budget: Intel Core i3-12100 - A solid choice for entry-level gaming and general use.
- Mid-Range: Intel Core i5-13600K - Great for gaming and multitasking, offering a high-performance-to-cost ratio.
- High-End: Intel Core i9-13900K - Ideal for gaming, content creation, and heavy workloads with multi-core performance.
-
AMD Options:
- Budget: AMD Ryzen 5 5600 - Affordable with excellent multitasking ability, suitable for budget gaming and daily tasks.
- Mid-Range: AMD Ryzen 5 7600X - Strong single-threaded performance for gaming and light productivity tasks.
- High-End: AMD Ryzen 9 7950X - High core count, ideal for streaming, video editing, and other intensive workloads.
2. Motherboard
-
Intel-Compatible:
- Budget: MSI PRO B660M-A DDR4 - Compact, budget-friendly with PCIe 4.0 support and enough ports for general use.
- Mid-Range: ASUS ROG Strix Z690-A Gaming WiFi D4 - Supports Intel’s 12th and 13th gen CPUs, ideal for gaming and productivity.
- High-End: ASUS ROG Maximus Z790 HERO - Packed with features for overclocking and high-end gaming setups.
-
AMD-Compatible:
- Budget: ASRock B550M Steel Legend - Excellent value for Ryzen 5000 series with PCIe 4.0 support.
- Mid-Range: MSI MPG B650 TOMAHAWK WiFi - Great for the Ryzen 7000 series with solid VRM cooling and features.
- High-End: ASUS ROG Crosshair X670E HERO - Advanced cooling, connectivity, and overclocking support for Ryzen 7000.
3. RAM (Random Access Memory)
-
Corsair Vengeance LPX DDR4:
- Budget: 16GB (2x8GB) 3200MHz - Ideal for gaming and light multitasking setups.
- Mid-Range: 32GB (2x16GB) 3600MHz - Good for high-performance gaming and content creation.
-
G.Skill Trident Z5 RGB DDR5:
- High-End: 32GB (2x16GB) 6000MHz - DDR5 RAM with high speeds, best suited for Intel 13th gen and AMD Ryzen 7000 builds for enhanced bandwidth and multitasking.
4. Storage (SSD and HDD)
-
SSD Options:
- Budget: Kingston NV1 500GB NVMe - Affordable and reliable for operating systems and core applications.
- Mid-Range: Samsung 970 EVO Plus 1TB NVMe - Fast read and write speeds, excellent for gaming and general use.
- High-End: Samsung 980 PRO 2TB NVMe - PCIe 4.0 drive with ultra-fast speeds, ideal for high-end gaming and creative workloads.
-
HDD Options:
- Seagate BarraCuda 2TB HDD - Affordable bulk storage for photos, videos, and other files.
- Western Digital Black 4TB HDD - Faster HDD suitable for gaming libraries and general storage needs.
5. GPU (Graphics Processing Unit)
-
NVIDIA Options:
- Budget: NVIDIA GeForce GTX 1660 Super - Solid entry-level card for 1080p gaming.
- Mid-Range: NVIDIA GeForce RTX 3060 Ti - Excellent for 1440p gaming and content creation at a reasonable price.
- High-End: NVIDIA GeForce RTX 4080 - Delivers incredible 4K gaming performance and ray tracing capabilities.
-
AMD Options:
- Budget: AMD Radeon RX 6600 - Great value for 1080p gaming.
- Mid-Range: AMD Radeon RX 6700 XT - Competes with the RTX 3060 Ti, offering excellent 1440p performance.
- High-End: AMD Radeon RX 7900 XTX - Strong alternative to the RTX 4080 with 4K performance.
6. Power Supply Unit (PSU)
- Corsair RM750x (750W): Gold-rated, modular PSU with enough power for mid to high-end builds. Reliable for gaming and workstation setups.
- EVGA SuperNOVA 850 G5 (850W): Fully modular, 80 PLUS Gold-rated, ideal for higher-end builds with powerful GPUs.
- Seasonic PRIME TX-1000 (1000W): Titanium-rated efficiency for high-performance and overclocked systems, a great choice for ultimate stability and power.
7. Case
- Budget: NZXT H510 - Compact, minimalist design with excellent airflow for mid-range builds.
- Mid-Range: Corsair 4000D Airflow - Known for outstanding airflow and cable management, a great choice for most builds.
- High-End: Lian Li PC-O11 Dynamic - Stylish case with a focus on cooling, offering excellent space for custom water cooling setups.
8. CPU Cooler
-
Air Coolers:
- Budget: Cooler Master Hyper 212 EVO - Affordable, efficient, and widely compatible for budget builds.
- Mid-Range: be quiet! Dark Rock Pro 4 - High performance and quiet cooling for mid-to-high-end CPUs.
-
Liquid Coolers:
- Mid-Range: Corsair iCUE H100i Elite Capellix - 240mm liquid cooler with RGB, ideal for cooling overclocked CPUs.
- High-End: NZXT Kraken Z63 - 280mm cooler with an LCD screen, excellent for custom cooling and aesthetics.
Summary
Each part listed here represents some of the best options at various price points and performance levels. This guide provides options for entry-level, mid-range, and high-end builds, making it easier to customize your setup based on your specific needs and budget. Let me know if you'd like a visual breakdown of these parts or assistance with combining them for a particular type of build!